How to Make Beef Donburi: A Hearty Japanese Rice Bowl

How to Make Beef Donburi

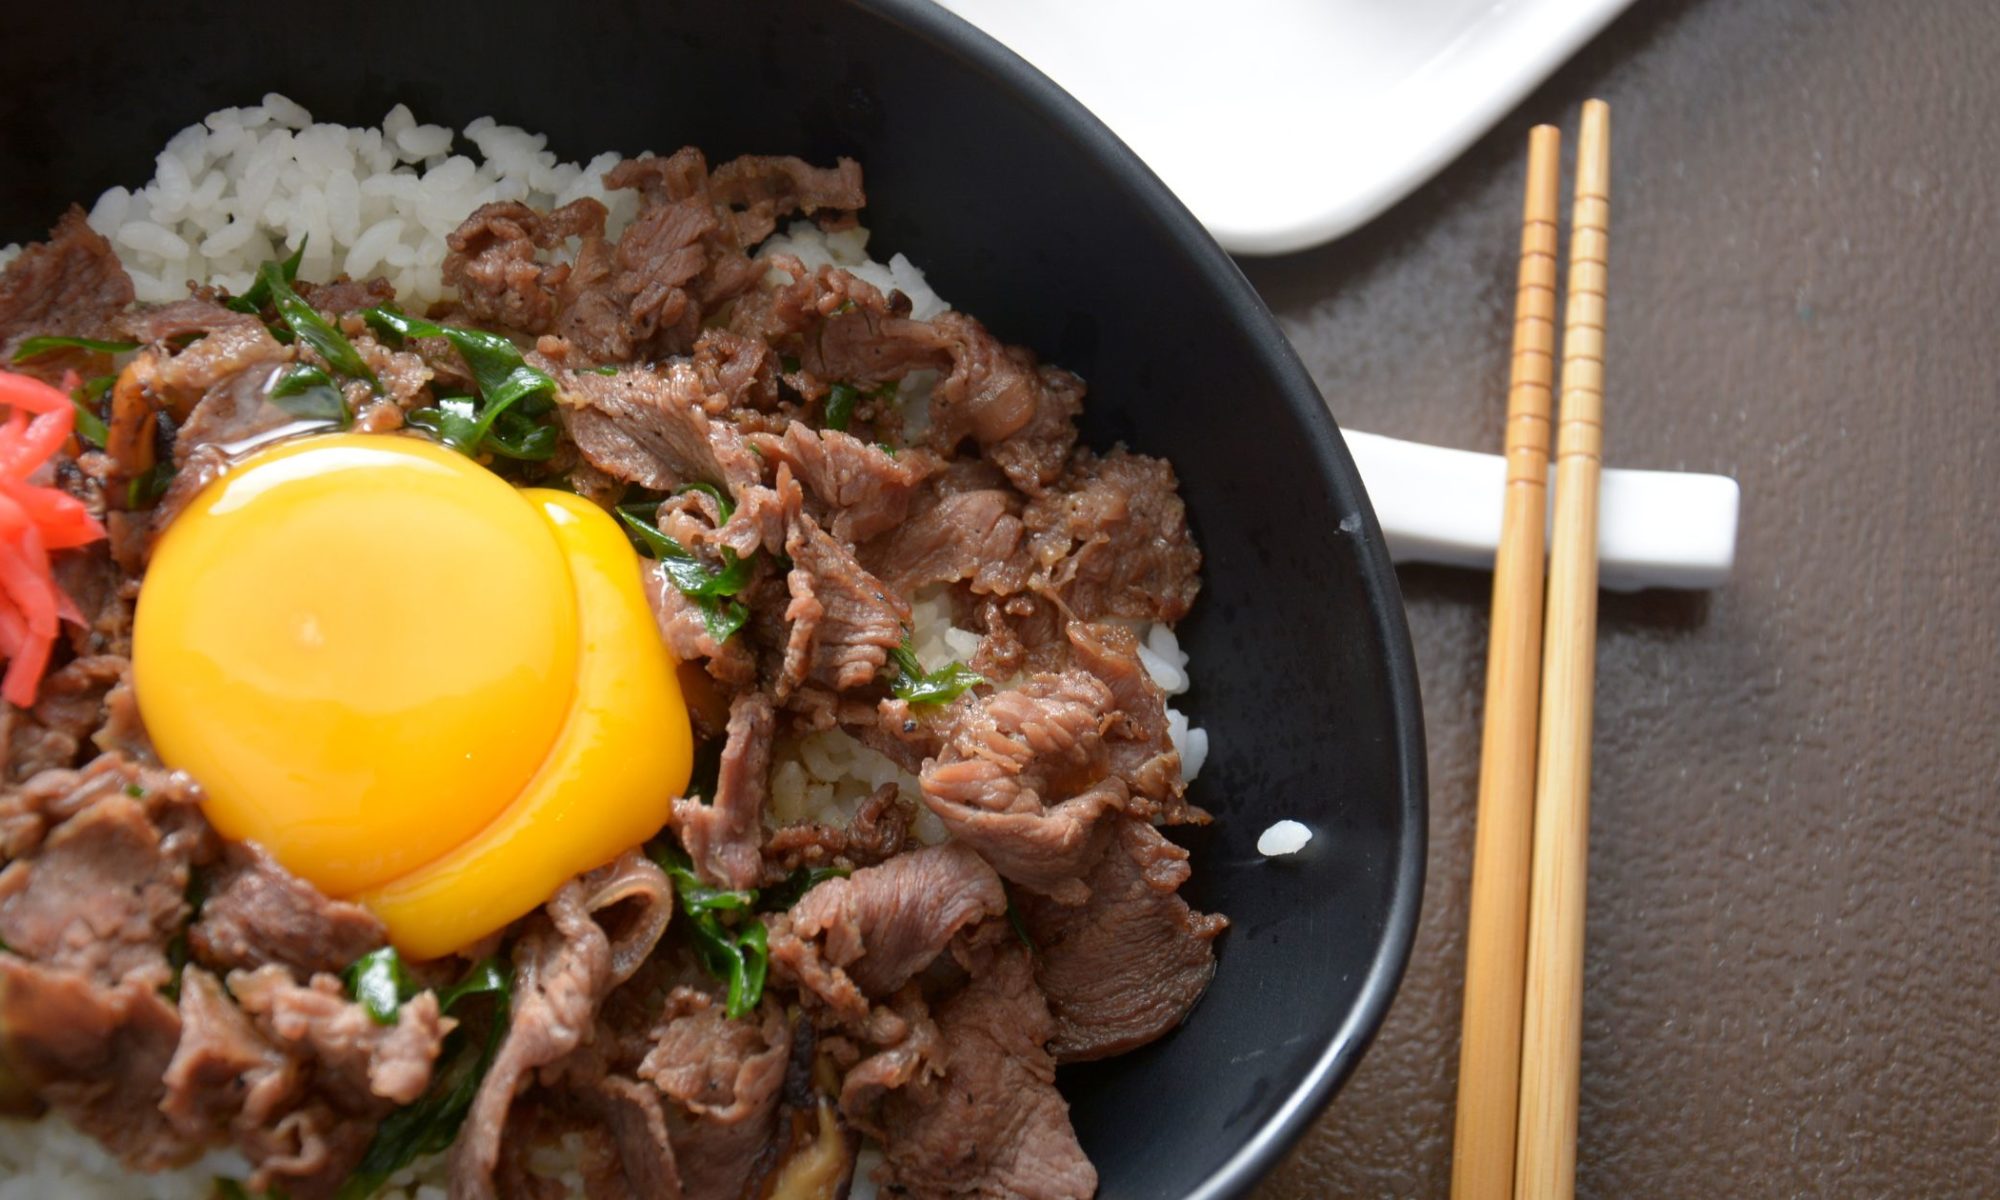
Beef Donburi, or “Gyudon” as it’s traditionally known in Japan, is a beloved dish that marries the simplicity of steamed rice with the rich flavors of simmered beef and onion. This dish, which can be found from the bustling streets of Tokyo to the quiet kitchens of homes across the world, offers a comforting taste of Japanese cuisine that’s both easy to prepare and deeply satisfying. In this guide, we’ll take you through the steps to create your own Beef Donburi at home, exploring its ingredients, cooking techniques, and the cultural significance that makes it so special.

The Origins of Donburi

Before we delve into the cooking process, it’s worth appreciating the origins and evolution of Donburi. The term “Donburi” refers to a category of Japanese dishes that consist of a bowl of steamed rice with various toppings. The beauty of Donburi lies in its versatility; it can be topped with anything from fish and seafood to meat and vegetables, making it a staple meal for many in Japan. Gyudon, specifically, became popular in the late 19th century as Japan opened up to the world, and beef became more widely available. It’s a dish that reflects both the tradition and adaptability of Japanese cuisine, embodying flavors that are complex yet comforting.

Ingredients for Beef Donburi

To make Beef Donburi, you’ll need the following ingredients:

  • Thinly Sliced Beef: Look for cuts like ribeye or sirloin for the best texture and flavor.
  • Onions: Sliced thinly, they add sweetness and depth to the dish.
  • Soy Sauce, Mirin, and Sake: These provide the classic savory, sweet, and umami-rich base of the sauce.
  • Sugar: Just a bit to balance the flavors.
  • Dashi Stock: This infuses the dish with a subtle seafood umami. You can make your own or use instant dashi powder.
  • Steamed Rice: Short-grain Japanese rice is preferred for its sticky texture and ability to absorb flavors.
  • Garnishes: Green onions, pickled ginger, and sesame seeds are common toppings.

Preparing the Ingredients

Rice Preparation

The foundation of any donburi dish is its rice. Japanese short-grain rice is preferred for its stickiness and ability to absorb flavors. Washing the rice is crucial; it removes excess starch, preventing the rice from becoming too sticky or gummy after cooking. The process involves rinsing the rice under cold water until the water runs clear, which may take several rinses.

Cooking the rice can be done in a rice cooker or on the stovetop. A rice cooker is convenient and provides consistent results. If using a stovetop, the general rule is to use a 1:1 ratio of rice to water, bring it to a boil, then cover and simmer on low heat for about 15 minutes. Let it steam for another 10 minutes off the heat before fluffing with a fork.

Beef and Onions

Choosing the right cut of beef is important. Ribeye or sirloin are excellent choices because they offer a good balance of fat and muscle, contributing to the dish’s flavor and texture. The beef must be sliced very thinly, almost paper-thin, which allows it to cook quickly and soak up the savory sauce. You can ask your butcher to slice the beef for you, or partially freeze the beef before slicing it at home for easier handling.

Onions add sweetness and depth to the dish. Slicing them thinly ensures they cook quickly and become tender, melding their flavors with the sauce and beef.

Cooking Beef Donburi

Start the Sauce

The sauce is what gives Beef Donburi its characteristic flavor. Soy sauce provides saltiness and umami, mirin adds sweetness and a hint of acidity, and sake introduces a depth of flavor that can’t be replicated with other ingredients. Sugar balances the saltiness, and dashi stock introduces a subtle seafood umami that rounds out the sauce. Combining these ingredients and bringing them to a simmer allows the flavors to meld.

Add the Onions

Adding the onions to the simmering sauce allows them to soften and become translucent, absorbing the flavors of the sauce. This step is essential for building the base flavor of the dish, as the onions release their natural sugars, contributing to the overall sweetness and complexity of the sauce.

Add the Beef

Once the onions are tender, adding the thinly sliced beef is the next step. It’s important to spread the beef slices evenly in the pan to ensure they cook uniformly. The beef cooks quickly due to its thinness, absorbing the sauce’s flavors and becoming tender. Overcooking the beef can make it tough and chewy, so monitoring this step closely is crucial.

Assemble the Bowls

The assembly begins with a base of steamed rice, providing a neutral background that complements the savory beef and onion topping. Arranging the beef and onions over the rice, then ladling the cooking sauce on top, ensures that every bite is flavorful and moist.

Garnish and Serve

Garnishes are not just decorative; they add essential flavors and textures to the dish. Green onions add a fresh, sharp contrast to the savory beef, while pickled ginger introduces a zesty, slightly sweet tang that cleanses the palate between bites. Sesame seeds offer a subtle nuttiness and a crunch that contrasts the dish’s overall tenderness.

Each step in preparing and cooking Beef Donburi is designed to build layers of flavor, from the base of perfectly cooked rice to the savory beef and onions, balanced with the complexity of the sauce and the freshness of the garnishes. By following these steps carefully, you can create a delicious and authentic Beef Donburi at home that rivals those found in the best Japanese restaurants.

Cultural Significance and Variations

Beef Donburi is more than just a meal; it’s a reflection of Japan’s culinary history and its openness to adapting foreign influences into something uniquely Japanese. This dish has evolved over the years, with variations that include additional vegetables, different types of meat, and even seafood versions. Each region in Japan has its take on Donburi, showcasing local flavors and ingredients.

Tips for Perfect Beef Donburi

  • Slice Against the Grain: When preparing the beef, slice against the grain to ensure tender pieces that melt in your mouth.
  • Balance the Flavors: The key to a delicious Gyudon is the balance of sweet, salty, and umami flavors. Adjust the seasonings to your taste, adding a little more soy sauce for saltiness or sugar for sweetness if needed.
  • Simmer Gently: When cooking the beef and onions, a gentle simmer allows the flavors to meld together without overcooking the beef.

Also Read: How to Make Japanese Beef Curry: A Step-by-Step Guide

Conclusion

Beef Donburi is a testament to the simplicity and elegance of Japanese cuisine. It’s a dish that comforts the soul with its warm bowl of rice and savory toppings. By following this guide, you can bring a taste of Japan into your home, exploring the rich flavors and cultural significance of this beloved dish. Whether you’re a seasoned cook or new to Japanese cuisine, Beef Donburi is a delightful meal that’s sure to impress.

How to Make Tekka Maki: A Timeless Sushi Classic

How to Make Tekka Maki

In the vast and colorful tapestry of Japanese cuisine, Tekka Maki holds a special place, embodying the simplicity, elegance, and depth of flavors that Japanese food is celebrated for. Tekka Maki, or tuna roll sushi, is a classic sushi type that marries the rich taste of fresh tuna with the subtle tang of sushi rice, all wrapped in a crisp nori (seaweed) sheet. This article will guide you through the steps to create your own Tekka Maki at home, diving into the history, techniques, and tips to ensure your sushi is as authentic and delicious as it can be.

Understanding Tekka Maki

Before we embark on the culinary journey of making Tekka Maki, it’s essential to appreciate its components. Tekka Maki is a type of Hosomaki, which translates to “thin roll.” It typically consists of a single ingredient – in this case, tuna – rolled with sushi rice in nori. The key to its preparation lies in the quality of ingredients and the precision of technique, elements that are paramount in Japanese cuisine.

Ingredients You’ll Need

Sushi Rice: The foundation of any sushi, the rice must be cooked and seasoned to perfection. You’ll need short-grain sushi rice, rice vinegar, sugar, and salt.

Tuna (Maguro): Look for sushi-grade tuna to ensure freshness and quality. The tuna should be bright in color, firm to the touch, and devoid of any fishy odor.

Nori (Seaweed Sheets): Select high-quality nori that’s crisp and without any tears or blemishes.

Wasabi and Soy Sauce: For serving. Wasabi adds a spicy kick, while soy sauce complements the flavors of the fish and rice.

Equipment Required

  1. Bamboo sushi rolling mat
  2. Sharp knife
  3. Rice cooker (optional but recommended)
  4. Plastic wrap (to keep the mat clean)

Step-by-Step Guide to Making Tekka Maki

Preparing the Sushi Rice

  • Rinse the Rice: Begin by rinsing 2 cups of sushi rice under cold water until the water runs clear. This step removes excess starch, ensuring the rice will be fluffy and not too sticky.
  • Cook the Rice: Cook the rice according to the package instructions or in a rice cooker. Once cooked, let it sit for about 10 minutes with the lid on to steam.
  • Season the Rice: Mix ¼ cup of rice vinegar, 2 tablespoons of sugar, and 1 teaspoon of salt in a small saucepan. Heat until the sugar and salt dissolve. Transfer the cooked rice to a large bowl and gently fold in the vinegar mixture with a wooden spatula. Allow the rice to cool to room temperature before using.

Preparing the Tuna

  • Slice the Tuna: Cut the tuna into long, thin strips about ¾ inch thick. The length should be slightly less than the width of your nori sheet.

Assembling the Tekka Maki

  • Prepare Your Rolling Mat: Cover your bamboo mat with plastic wrap to prevent sticking and to keep it clean.
  • Lay Out the Nori: Place a sheet of nori shiny side down on the mat. With wet hands (to prevent sticking), spread a thin layer of rice evenly over the nori, leaving about ½ inch of nori exposed at the top edge.
  • Add the Tuna: Place a strip of tuna along the bottom edge of the rice-covered nori.
  • Roll the Maki: Begin rolling from the bottom edge, using the mat to firmly but gently compact the roll into a cylindrical shape. Ensure the exposed nori at the top sticks to the roll to seal it.
  • Cut the Roll: With a sharp, wet knife, cut the roll into six or eight equal pieces. Wetting the knife prevents the rice from sticking and ensures clean cuts.

Serving Your Tekka Maki

Arrange the Tekka Maki on a plate with the cut side facing up. Serve with small amounts of wasabi and soy sauce for dipping. The beauty of Tekka Maki lies in its simplicity, allowing the quality of the ingredients to shine through.

Tips for Perfect Tekka Maki

  • Rice Consistency: The rice should be sticky but not mushy. Achieving the right consistency is crucial for the roll to hold together.
  • Quality of Ingredients: Use the freshest, highest-quality ingredients possible, especially the tuna, as it is the star of the dish.
  • Practice: Rolling sushi is an art that requires practice. Don’t be discouraged if your first few rolls are less than perfect.

Also Read: Maki Roll vs. Hand Roll – What’s the Difference

Conclusion

Making Tekka Maki at home can be a rewarding experience, offering a taste of Japan’s rich culinary tradition. Whether you’re a seasoned sushi maker or a newcomer to the art, the process of creating these simple yet delicious rolls can be a delightful culinary adventure. With fresh ingredients, a bit of patience, and a willingness to learn, you can bring a piece of Japanese cuisine into your kitchen, sharing the joy of sushi with friends and family. Enjoy the process, and savor every bite of your homemade Tekka Maki.

Discovering the Delight: What is Chicken Katsu Donburi (Katsu Donburi Recipe)

What is Chicken Katsu Donburi

In the vast world of Japanese cuisine, there exists a dish that embodies the essence of comfort, satisfaction, and culinary mastery – Chicken Katsu Donburi. This mouthwatering meal combines crispy fried chicken cutlets with fluffy rice, all bathed in a rich, savory sauce and topped with a velvety egg. Its simplicity belies its depth of flavor, making it a beloved favorite both in Japan and across the globe.

The Art of Crafting Chicken Katsu Donburi

At its core, Chicken Katsu Donburi is a comforting one-bowl meal that features the iconic Japanese ingredient: katsu. Katsu refers to breaded and deep-fried meat or seafood, typically served with a side of rice and a savory sauce. In the case of Chicken Katsu Donburi, tender chicken breast or thigh is coated in a crispy panko breadcrumb crust, fried to golden perfection, and then sliced into strips or bite-sized pieces.

The Symphony of Flavors: Components of Chicken Katsu Donburi

One of the defining features of Chicken Katsu Donburi is its luscious sauce. Known as “donburi sauce” or “katsu sauce,” this condiment is a sweet and savory blend of Worcestershire sauce, soy sauce, sugar, and other seasonings. It strikes a delicate balance between tangy and sweet, enhancing the overall taste of the dish and tying all the components together.

Recipe: Chicken Katsu Donburi

Ingredients:

  • 2 boneless, skinless chicken breasts or thighs
  • Salt and pepper to taste
  • 1/2 cup all-purpose flour
  • 2 eggs, beaten
  • 1 cup panko breadcrumbs
  • Vegetable oil for frying
  • 4 cups cooked Japanese short-grain rice
  • 2 green onions, thinly sliced (for garnish)
  • Furikake (optional, for garnish)

For the Donburi Sauce:

  • 1/4 cup Worcestershire sauce
  • 1/4 cup soy sauce
  • 2 tablespoons sugar
  • 2 tablespoons mirin
  • 1/2 cup dashi (Japanese soup stock) or chicken broth

Instructions:

Prepare the Chicken:

  • If using chicken breasts, slice them horizontally to create thinner cutlets. Season both sides of the chicken with salt and pepper.
  • Place the flour, beaten eggs, and panko breadcrumbs into three separate shallow dishes.
  • Dredge each chicken cutlet in the flour, shaking off any excess. Dip them into the beaten eggs, allowing any excess to drip off, then coat them evenly in the panko breadcrumbs, pressing gently to adhere. Set aside.

Fry the Chicken:

  • In a large skillet, heat vegetable oil over medium-high heat until it reaches 350°F (175°C).
  • Carefully place the breaded chicken cutlets into the hot oil, working in batches if necessary to avoid overcrowding the pan.
  • Fry the chicken for 4-5 minutes on each side, or until they are golden brown and cooked through. Transfer them to a paper towel-lined plate to drain any excess oil.

Prepare the Donburi Sauce:

  • In a small saucepan, combine the Worcestershire sauce, soy sauce, sugar, mirin, and dashi or chicken broth.
  • Bring the mixture to a simmer over medium heat, stirring occasionally, until the sugar has dissolved and the sauce has slightly thickened. Remove from heat and set aside.

Assemble the Chicken Katsu Donburi:

  • Divide the cooked rice evenly among four serving bowls.
  • Slice the fried chicken cutlets into strips or bite-sized pieces and arrange them on top of the rice in each bowl.
  • Drizzle the donburi sauce generously over the chicken and rice.
  • Crack a raw egg onto the center of each bowl.
  • Garnish with thinly sliced green onions and a sprinkle of furikake, if desired.

Serve and Enjoy:

Serve the Chicken Katsu Donburi immediately, allowing diners to mix the egg into the hot rice and sauce before enjoying.

Additional Tips

Pickled Vegetables: Serve Chicken Katsu Donburi with a side of Japanese pickled vegetables, such as pickled ginger, daikon radish, or cucumber. These tangy and refreshing accompaniments provide a delightful contrast to the richness of the dish.

Spicy Mayo Drizzle: For a modern twist, drizzle a bit of spicy mayonnaise over the Katsu Donburi before serving. The creamy heat of the mayo adds a delicious kick and extra dimension of flavor.

Katsu Curry: For a heartier variation, serve the crispy chicken katsu with Japanese curry sauce instead of the traditional donburi sauce. The aromatic curry adds warmth and depth of flavor, creating a comforting and satisfying meal.

Bento Box Presentation: For a visually stunning presentation, serve Chicken Katsu Donburi in a traditional Japanese bento box alongside a variety of side dishes such as steamed vegetables, edamame, and tamagoyaki (Japanese rolled omelette).

Also Read: What is Chicken Karaage and Chicken Karaage Recipe

Conclusion:

In essence, Chicken Katsu Donburi is more than just a meal – it’s a symphony of flavors and textures that evoke feelings of warmth, comfort, and culinary delight. With its crispy katsu, fluffy rice, savory sauce, and creamy egg, it’s a dish that satisfies both the stomach and the soul, leaving you craving just one more bite.

Whether enjoyed as a quick weeknight dinner or a special weekend indulgence, Chicken Katsu Donburi never fails to deliver an unforgettable dining experience. So why not roll up your sleeves, gather your ingredients, and embark on a culinary adventure that promises to tantalize your taste buds and transport you to the vibrant streets of Japan? After all, there’s nothing quite like the comforting embrace of a well-made Chicken Katsu Donburi to brighten your day and nourish your spirit.

What is Vegetable Tempura and How to Make It?

What is Vegetable Tempura

Creating a comprehensive article on each section of the proposed structure for “What is Vegetable Tempura” requires a blend of informative content, engaging writing, and practical advice. Here’s how an article covering all these sections might unfold, offering readers a deep dive into the world of vegetable tempura.

Understanding Vegetable Tempura

The History and Origin of Tempura

Tempura, a beloved Japanese dish, has a fascinating history that extends far beyond Japan’s borders. Originally introduced by Portuguese traders in the 16th century, tempura has evolved into a quintessential Japanese delicacy. This section would delve into the cultural fusion that gave birth to tempura, highlighting its adaptation and integration into Japanese cuisine.

What Makes Vegetable Tempura Unique

Unlike other fried foods, vegetable tempura is celebrated for its light, airy batter and the way it enhances, rather than masks, the natural flavors of the vegetables. This part of the article would explore the art of selecting and pairing vegetables for tempura, emphasizing the balance of textures and flavors.

The Key to Perfect Vegetable Tempura

Selecting the Right Vegetables

The choice of vegetables is crucial in tempura. This section would offer insights into choosing the best vegetables for tempura, considering factors like texture, water content, and how different vegetables complement each other in a tempura platter.

The Importance of Batter Consistency

The secret to the signature lightness of tempura lies in the batter. This part would discuss the critical aspects of batter consistency, including the role of cold water, the type of flour used, and techniques to avoid overmixing.

Choosing the Best Oil for Frying

The oil used for frying tempura not only affects its taste but also its texture. This segment would guide readers through selecting the ideal oil, focusing on smoke points, flavor profiles, and health considerations.

Step-by-Step Guide to Making Vegetable Tempura

Preparing the Ingredients

A detailed walkthrough of how to prepare vegetables for tempura, from washing and cutting to preparing the batter and dipping sauce. This section would provide practical tips for ensuring the vegetables are ready for frying, including batter mixing techniques and sauce preparation.

Crafting the Perfect Batter

Exploring the nuances of making tempura batter, this part would cover everything from the ratio of ingredients to the importance of temperature, ensuring readers can create the perfect mixture for light, crispy tempura.

Frying Techniques for Crispy Tempura

Frying tempura is an art form. This section would offer step-by-step instructions on frying tempura, including how to maintain oil temperature, test for readiness, and achieve a golden, crispy coating without overcooking the vegetables.

Additional Tips and Variations

Gluten-Free and Vegan Options

Acknowledging dietary restrictions and preferences, this part of the article would suggest alternatives for making tempura batter gluten-free and vegan, ensuring everyone can enjoy this delicious dish.

Innovative Tempura Combinations

Beyond traditional vegetables, this section would inspire readers to experiment with tempura, introducing unexpected ingredients like avocado, leafy greens, or exotic mushrooms, expanding the tempura experience.

Serving Suggestions and Presentation Ideas

Presentation is key to enjoying tempura. This segment would provide tips on serving tempura, from arranging a platter to pairing with dipping sauces and rice, enhancing the overall dining experience.

Also Read: What To Serve With Tempura Shrimp? The Best Side Dishes And Sauces

Vegetable Tempura Recipes

Classic Vegetable Tempura

A foundational recipe for classic vegetable tempura, detailing the ingredients, proportions, and steps to achieve the perfect result, from batter to frying.

Exotic Variations: Beyond the Classics

Encouraging culinary creativity, this section would feature recipes for unconventional tempura, incorporating ingredients like sweet potato, zucchini flowers, or seaweed, offering readers new flavors to explore.

Dipping Sauces and Accompaniments

No tempura is complete without dipping sauce. This part would include recipes for traditional tentsuyu sauce and other accompaniments, elevating the tempura eating experience.

Why You’ll Love This Mixed Tempura Recipe

Health Benefits of Vegetable Tempura

Dispelling myths about fried food, this section would highlight the nutritional value of the vegetables in tempura and discuss how tempura can be a part of a balanced diet.

Making Restaurant-Quality Tempura at Home

Concluding with encouragement and expert tips, this part would reassure readers that making tempura at home can yield results as satisfying as those from a Japanese restaurant, inviting them to try their hand at this culinary art.

FAQs on Making Vegetable Tempura

How to Store Leftover Tempura

Offering practical advice for storing and reheating tempura to maintain its texture and flavor, ensuring that leftovers can still be enjoyed.

Common Mistakes to Avoid

A roundup of typical pitfalls in making tempura, from batter issues to frying technique, this section would help readers steer clear of common errors, paving the way for perfect tempura every time.

What is a Spider Roll? Exploring the Culinary Delight of Spider Rolls

What is a Spider Roll

Step into the enchanting world of sushi, where culinary artistry meets gastronomic delight, and let me introduce you to a true gem of Japanese cuisine – the Spider Roll. Despite its name evoking images of arachnids, rest assured, there are no creepy crawlies involved in this delectable dish. Instead, picture a symphony of flavors and textures coming together in perfect harmony to create a sushi roll that’s as visually stunning as it is delicious. Join me on a journey as we unravel the secrets behind the Spider Roll, discovering its origins, savoring its unique ingredients, and delving into the art of its preparation.

Origins of the Spider Roll:

The origins of the Spider Roll trace back to the bustling streets of Japan, where sushi chefs constantly innovate to satisfy the evolving palates of their patrons. It is believed that the Spider Roll first emerged in the United States, particularly in California, during the sushi boom of the 1970s and 1980s. Over time, it has become a staple on sushi menus around the world, captivating sushi enthusiasts with its unique blend of flavors.

Ingredients:

At the heart of the Spider Roll lies a perfect harmony of ingredients, each playing a crucial role in crafting its distinctive taste. The key components typically include:

  • Soft Shell Crab: The star of the show, soft shell crab, is lightly battered and fried to crispy perfection. Its delicate flavor and crunchy texture provide a satisfying contrast to the other ingredients.
  • Sushi Rice: A fundamental element of any sushi roll, sushi rice serves as the base, providing a sticky foundation to hold the roll together.
  • Nori (Seaweed): Thin sheets of nori wrap around the rice and filling, imparting a subtle umami flavor and adding a hint of oceanic essence to each bite.
  • Avocado: Creamy slices of avocado add richness and depth to the Spider Roll, balancing out the crispy texture of the crab with their buttery smoothness.
  • Cucumber: Crisp cucumber strips provide a refreshing crunch, elevating the overall texture and adding a burst of freshness to the ensemble.
  • Spicy Mayo: A drizzle of spicy mayo lends a kick of heat to the roll, infusing it with a tantalizing zing that keeps the taste buds tingling.

Prepare the Soft Shell Crab:

To begin, ensure the soft shell crab is thoroughly cleaned, removing any impurities. Once cleaned, season the crab with salt and pepper, ensuring an even coating. Lightly dust the crab with flour, which helps the batter adhere better. Then, dip the crab into a tempura batter, ensuring it is fully coated. In a frying pan or deep fryer, heat oil to 350°F (175°C). Carefully place the battered crab into the hot oil and fry until it achieves a golden brown and crispy texture, typically about 2-3 minutes on each side. Once cooked, remove the crab from the oil and allow it to drain on a paper towel-lined plate to remove excess oil.

Prepare the Sushi Rice:

Start by rinsing the sushi rice under cold water until the water runs clear, which removes excess starch. Combine the rinsed rice with water in a rice cooker or pot according to package instructions and cook until tender and slightly sticky. In a small bowl, mix together rice vinegar, sugar, and salt until fully dissolved. After the rice is cooked, transfer it to a large bowl and gently fold in the vinegar mixture using a spatula. Allow the rice to cool to room temperature before using it for the Spider Roll.

Also Read: How To Cook Sushi Rice Like A Michelin Star Chef

Prepare the Nori (Seaweed):

Begin assembling the Spider Roll by placing a sheet of nori on a bamboo sushi rolling mat with the shiny side facing down. Spread a thin layer of sushi rice evenly over the nori, leaving approximately half an inch of space at the top edge.

Assemble the Spider Roll:

Next, lay slices of avocado and cucumber along the center of the rice-covered nori sheet. Position the crispy soft shell crab on top of the avocado and cucumber. Using the bamboo mat, gently lift the edge of the nori closest to you and roll it over the filling, tucking the ingredients tightly. Continue rolling the mat away from you, applying gentle pressure to shape the roll into a tight cylinder. Once rolled, use the mat to compress the roll gently to ensure it holds its shape.

Slice and Serve:

Using a sharp knife, carefully slice the rolled sushi into individual pieces, wiping the blade with a damp cloth between cuts to prevent sticking. Arrange the Spider Roll pieces on a serving platter and drizzle spicy mayo over the top for an added kick of flavor. Serve the Spider Roll alongside pickled ginger, wasabi, and soy sauce for dipping.

Variations:

While the classic Spider Roll remains a perennial favorite, chefs often put their own unique spin on this beloved dish, experimenting with different ingredients and flavor combinations. Variations may include additions such as tobiko (flying fish roe), green onion, or even fruit such as mango for a touch of sweetness. Some chefs also opt to substitute the traditional tempura soft shell crab with alternatives such as cooked shrimp or imitation crab meat to cater to dietary preferences or restrictions.

Conclusion:

As we reluctantly take our last bite of the Spider Roll, we can’t help but feel a sense of satisfaction and contentment wash over us. In a world filled with culinary wonders, this humble sushi creation stands tall, captivating our taste buds and leaving us longing for more. Whether enjoyed as a solo indulgence or shared among friends, the Spider Roll never fails to impress, reminding us of the boundless creativity and ingenuity found in Japanese cuisine. So, the next time you find yourself craving a culinary adventure, remember the Spider Roll awaits, ready to whisk you away on a flavorful journey you won’t soon forget.