How to Cook Japanese Mackerel: A Culinary Journey into the Heart of Japan

how to cook japanese mackerel

Exploring the preparation of Japanese mackerel, known as Saba, reveals a window into Japan’s esteemed culinary practices. This fish, with its robust oceanic flavor and wealth of omega-3 fatty acids, is highly valued in Japanese cuisine for its delightful taste and health benefits. The journey from selecting the freshest specimen to the ceremonial presentation mirrors Japan’s minimalist yet profound approach to cooking.

The ritual of preparing mackerel is an ode to the sea’s bounty, emphasizing freshness, simplicity, and respect for ingredients. Through this article, you’ll not only discover how to masterfully cook mackerel but also appreciate its significance in Japanese culture. This culinary voyage promises to enhance your kitchen repertoire with techniques that highlight mackerel’s versatile and rich flavor profile, turning this humble fish into an exquisite dish that resonates with the essence of Japanese culinary heritage.

The Significance of Mackerel in Japanese Cuisine

Mackerel holds a special place in Japanese cuisine, not only for its delightful taste but also for its cultural significance. It’s a fish that’s been intertwined with Japanese history and traditions for centuries, often featured in seasonal celebrations and family meals alike. Rich in omega-3 fatty acids, mackerel is not just a feast for the taste buds but also a boon for heart health, making it a prized component of the Japanese diet, renowned for its benefits to longevity and wellness.

Selecting the Perfect Mackerel

The journey to a perfect Japanese mackerel dish begins at the market, with the selection of the fish. Freshness is paramount—look for mackerel with clear, bright eyes, firm flesh, and a clean, oceanic smell. In Japan, fishmongers take pride in offering the freshest catch, often brought in from the cold waters of the North Pacific and the Sea of Japan. For those living outside Japan, frozen mackerel can be a good alternative, as modern freezing techniques preserve the fish’s quality and nutritional value.

Preparation: The Art of Simplicity

Preparing mackerel the Japanese way requires a minimalist approach, honoring the ingredient’s natural flavors. The fish is typically cleaned and filleted, with the skin left on to retain moisture and flavor during cooking. A simple but crucial step in the preparation of mackerel is the curing process, where the fillets are lightly salted and left to sit for a few hours. This not only seasons the fish but also firms up the flesh, making it more succulent.

Classic Japanese Mackerel Recipe: Saba Shioyaki

Saba Shioyaki is a quintessential Japanese mackerel dish, where “saba” stands for mackerel, and “shioyaki” means grilled with salt. This recipe embodies the Japanese culinary philosophy of simplicity, allowing the natural flavors of the fish to shine through.

 Japanese Mackerel Recipe Ingredients:

  • 2 mackerel fillets
  • Sea salt
  • Vegetable oil (for grilling)
  • Lemon wedges and grated daikon radish (for serving)

Instructions

Follow these detailed steps to prepare a classic Japanese dish that is both simple and flavorful. Saba Shioyaki will impress with its perfect blend of flavors and textures, offering a taste of Japan with every bite.

Step 1: Prepare the Mackerel

Begin by thoroughly rinsing the mackerel fillets under cold running water. Use paper towels to pat the fillets dry, ensuring they are completely free of excess water. Generously sprinkle sea salt on both sides of each fillet, making sure the salt is evenly distributed across the surfaces. Leave the salted fillets to sit for approximately 1 hour. This curing process is not just for flavor; it also draws out moisture from the fish, enhancing the overall texture.

Step 2: Preheat the Grill

If you’re using an outdoor grill, preheat it to a high temperature to ensure it’s ready for cooking. For those opting for a broiler, position a rack about 6 inches from the heat source and preheat to a high setting. This setup mimics the intense heat of a grill.

Step 3: Rinse and Dry Again

Once the mackerel has cured, rinse off the salt under cold water to ensure the fish will not be overly salty. Pat the fillets dry once more with paper towels, making them ready for grilling with no excess moisture.

Step 4: Oil and Grill

Lightly oil the grill grates or a broiler pan to prevent the fish from sticking during the cooking process. Place the mackerel fillets skin-side down on the grill or broiler pan. Cook the fillets for about 3-4 minutes on each side, or until the skin becomes crisp and the flesh cooks through, becoming flaky and tender.

Step 5: Serve

Serve the grilled mackerel immediately while it’s still hot, accompanied by lemon wedges and grated daikon radish on the side. The acidity of the lemon and the sharpness of the daikon perfectly complement the rich, oily nature of the mackerel.

Enjoy your beautifully grilled mackerel, a dish that brings the essence of Japanese cuisine to your table. The simplicity of this recipe allows the natural flavors of the fish to stand out, enhanced by subtle seasoning and perfect grilling technique. This dish not only offers a delicious taste experience but also a healthy one, rich in omega-3 fatty acids.

The Cultural Tapestry of Japanese Mackerel Dishes

Saba Shioyaki is just one of the myriad ways mackerel is enjoyed in Japan. From the vinegared mackerel sushi (Saba Sushi) of the Kansai region to the comforting mackerel miso stew (Saba no Misoni) that warms many Japanese homes during the colder months, mackerel’s versatility is a testament to its cherished status in Japanese cuisine.

Also Read: Japanese Fried Food: Savoring the Crispy Delights of Japan

Conclusion: A Journey of Flavor and Tradition

Learning to cook Japanese mackerel is more than just mastering a recipe; it’s an immersion into a culture that venerates the harmony of nature, tradition, and taste. Whether grilled, broiled, or simmered, each dish tells a story of the seas that surround Japan and the generations of cooks who have honed their craft to bring out the best in this humble fish. As you enjoy your mackerel, remember that you’re partaking in a tradition that spans centuries, a celebration of flavor, health, and the simple joys of cooking and eating.

Japanese Chirashi Bowl: From Traditional to Fusion Variations

Japanese Chirashi Bowl

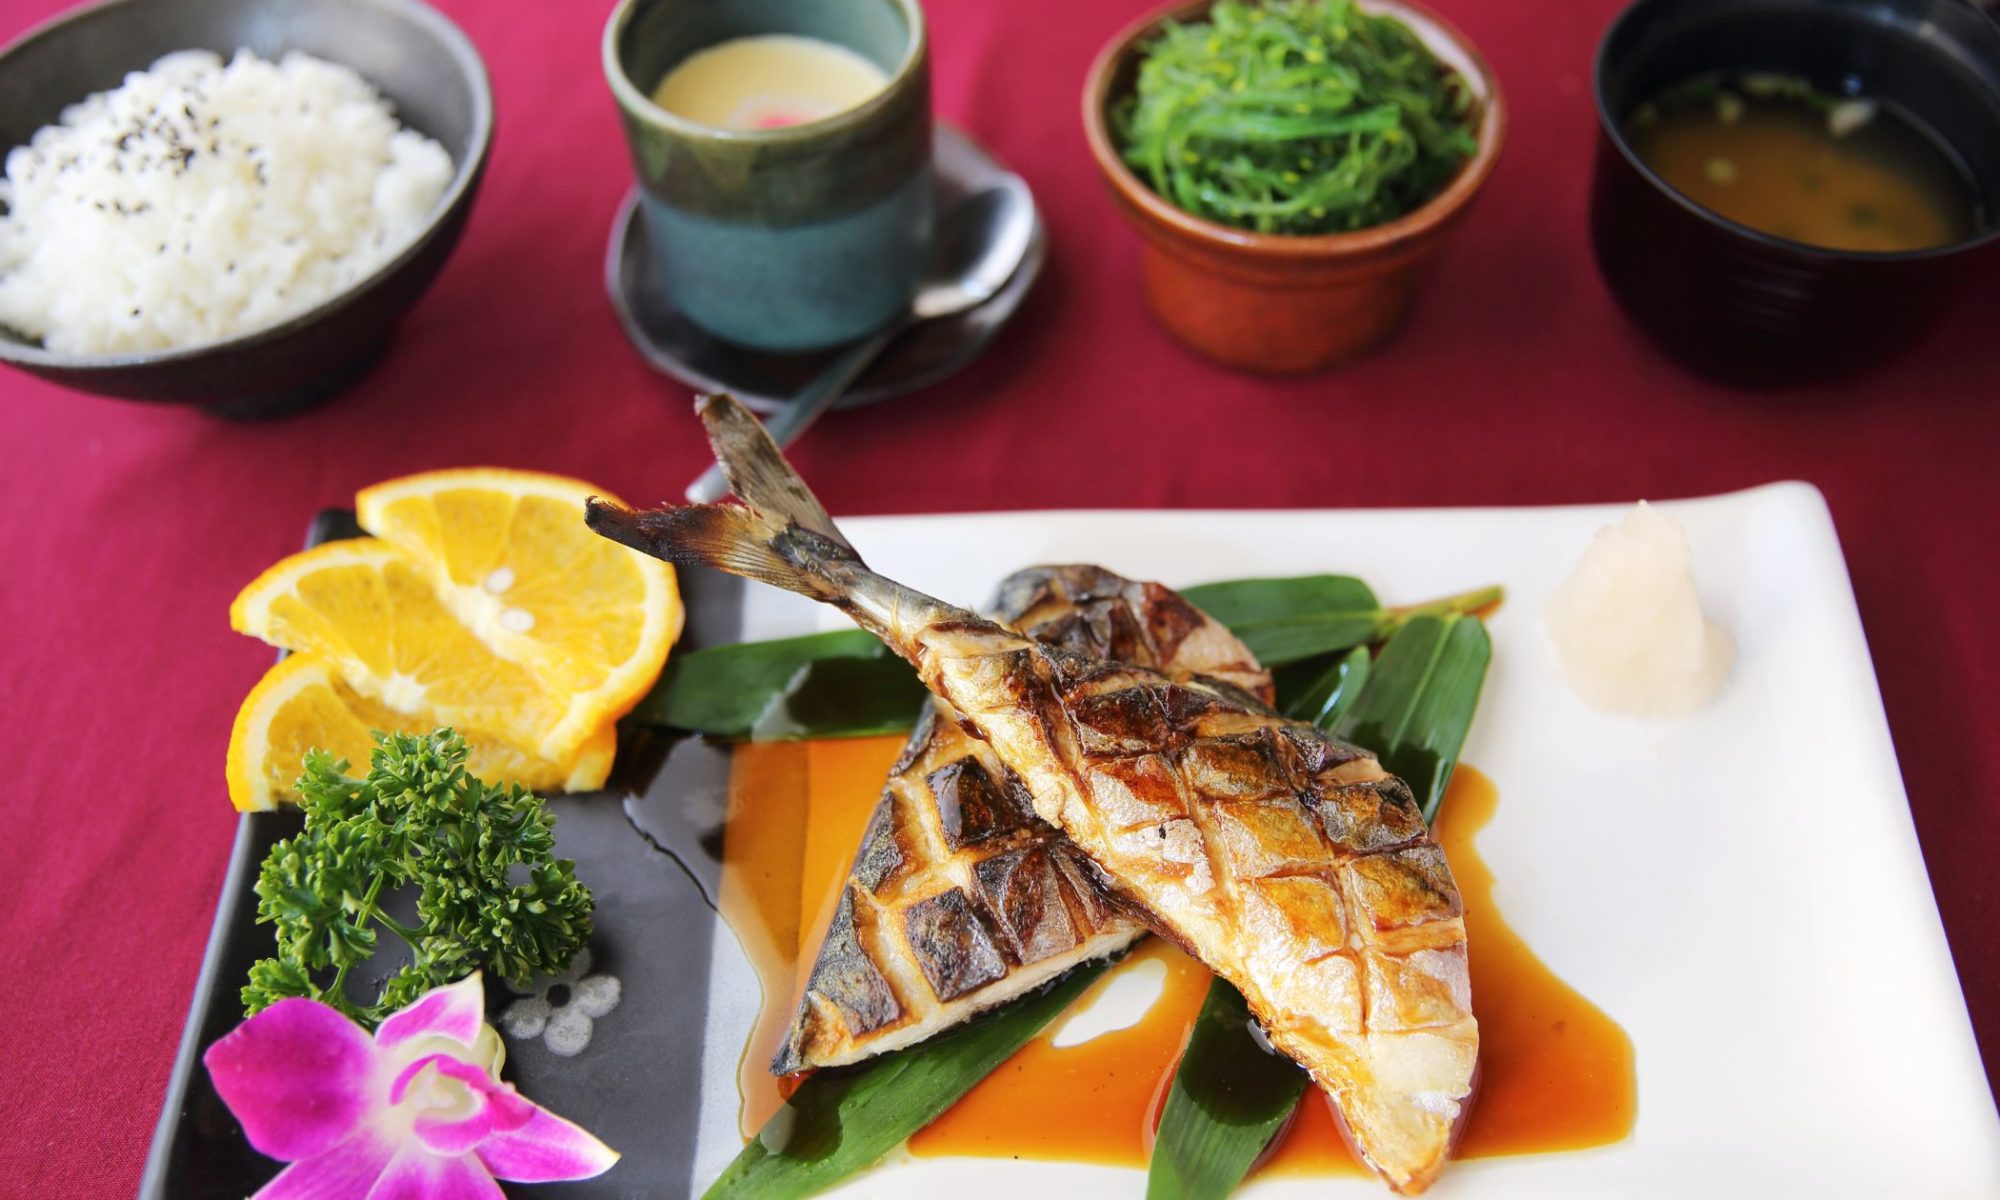
The Japanese chirashi bowl, a vibrant mélange of sushi rice, fresh seafood, vegetables, and sometimes tropical fruits, stands as a testament to the elegance and diversity of Japan’s culinary arts. This dish, celebrated for its exquisite balance of flavors and textures, serves not just as a meal but as a canvas, showcasing the artistry of Japanese cuisine. Unlike sushi rolls or sashimi that command precision in form, chirashi sushi celebrates freedom in its assembly, making each bowl a unique expression of the ingredients’ natural beauty and the chef’s personal touch. Its appeal transcends borders, inviting food enthusiasts worldwide to explore the rich tapestry of flavors and traditions encapsulated in a single bowl.

History of Japanese Chirashi Bowl

Tracing the lineage of the chirashi bowl leads us back to the early Edo period (1603–1868) in Japan, where it began not just as a dish but as a culinary tradition. Chirashi, meaning “scattered,” refers to the artful spread of seafood and vegetables over sushi rice. This dish was born from a practical need for quick, nourishing meals among the bustling fish markets and busy streets of Edo (now Tokyo). Over time, it evolved into a refined culinary practice, embodying both the simplicity and complexity of Japanese cuisine.

As the chirashi bowl wove its way through the fabric of Japanese culinary history, regional variations emerged, each telling its own story of local flavors and seasonal offerings. In some areas, the dish became a colorful celebration of the sea’s bounty, featuring an array of raw fish and shellfish. In others, it took on a more reserved appearance, emphasizing pickled vegetables and tamagoyaki (Japanese omelette) alongside a modest serving of seafood. These variations not only highlight the versatility of the chirashi bowl but also reflect the deep connection between Japanese cuisine and the natural world.

Today, the chirashi bowl remains a beloved fixture in Japanese dining, enjoyed in homes and restaurants alike for its delightful combination of taste, texture, and color. Its history is a testament to the enduring appeal of Japanese cuisine, inviting us to explore a world where food is more than sustenance—it’s an art form.

What is a Chirashi Bowl?

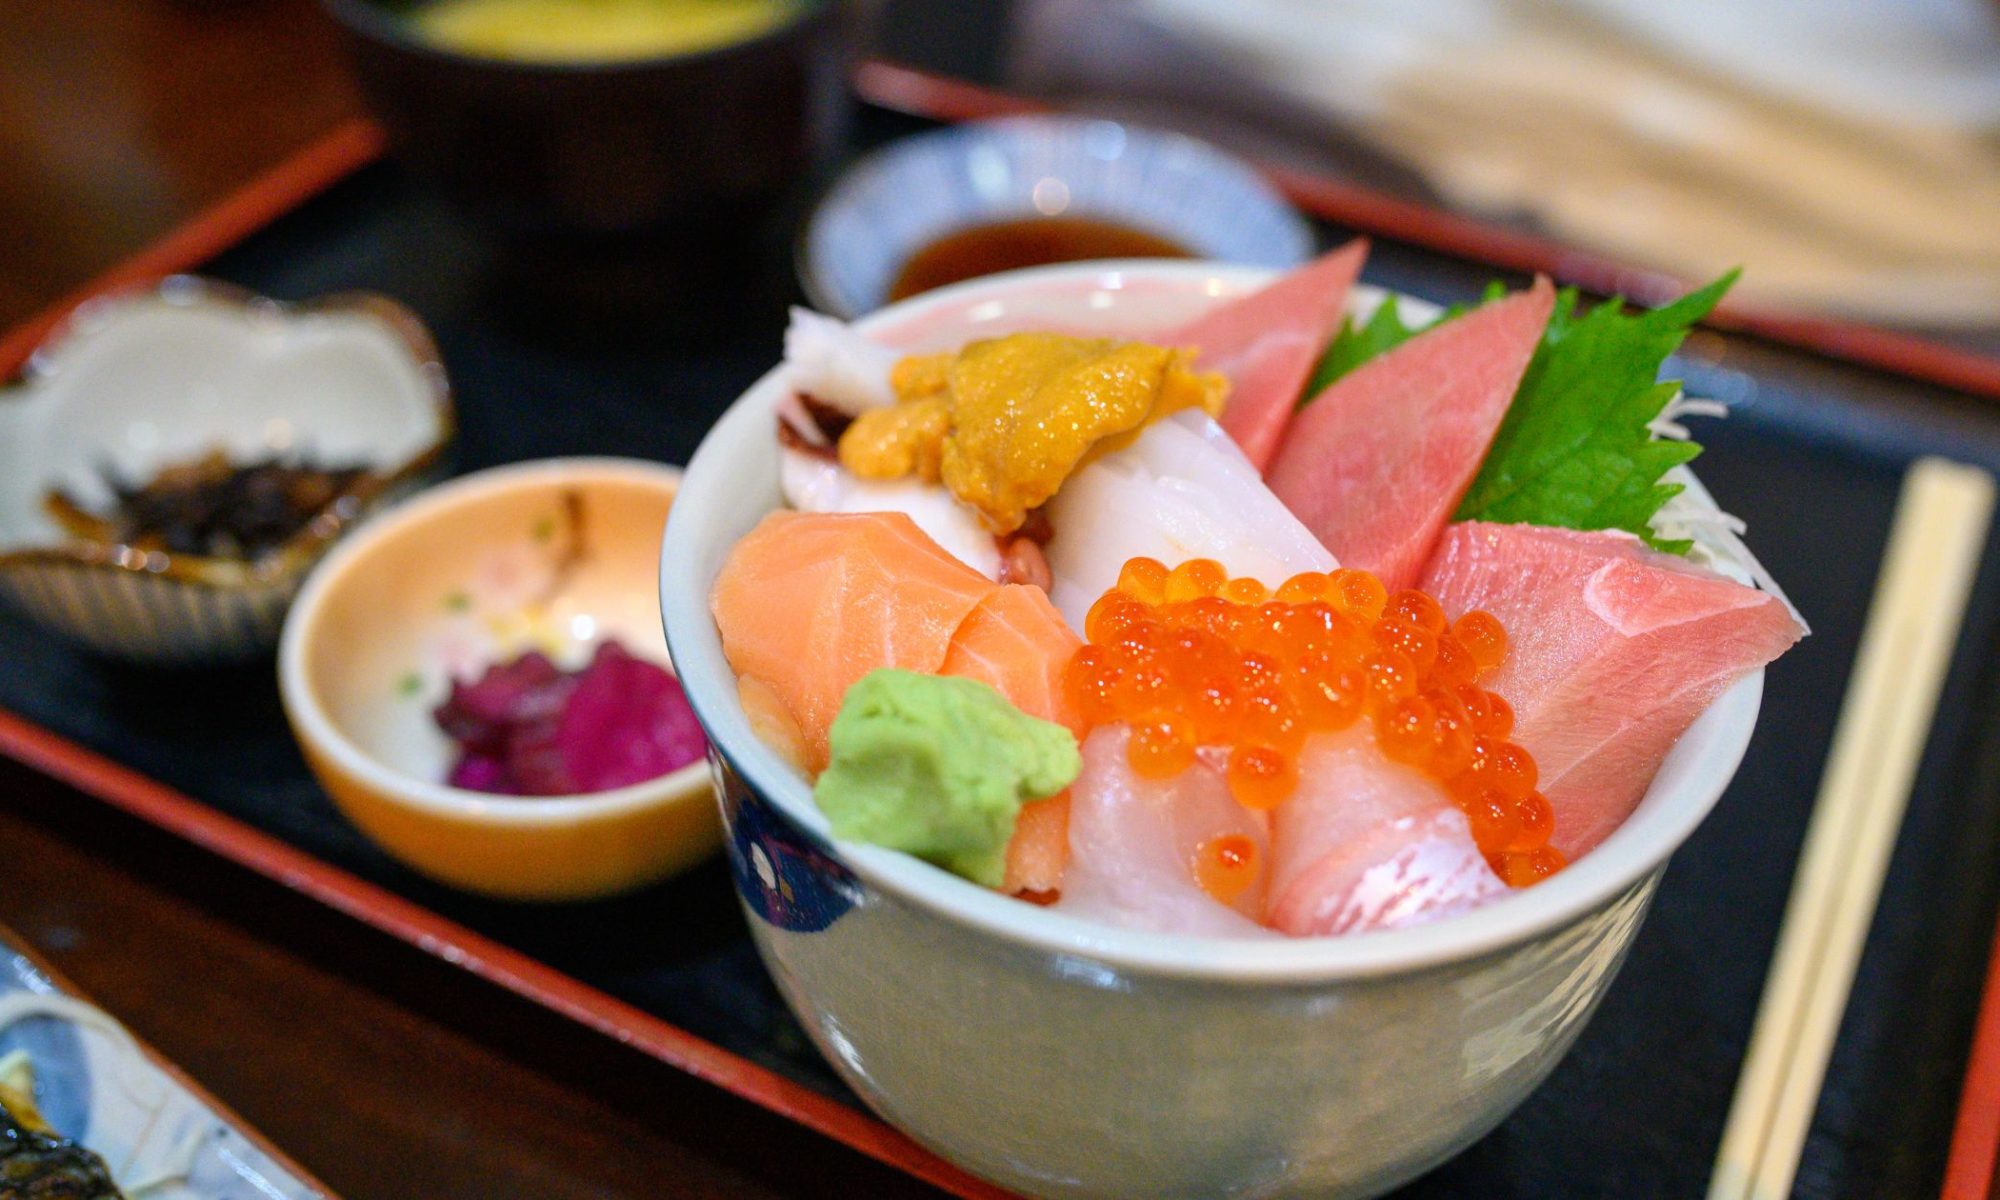
At its core, the chirashi bowl is a celebration of simplicity and elegance, embodying the Japanese aesthetic of wabi-sabi, which finds beauty in imperfection and transience. Chirashi, meaning “scattered”, is aptly named for its presentation of ingredients casually strewn over sushi rice. This dish is as much a feast for the eyes as it is for the palate, with its vibrant array of colors and textures.

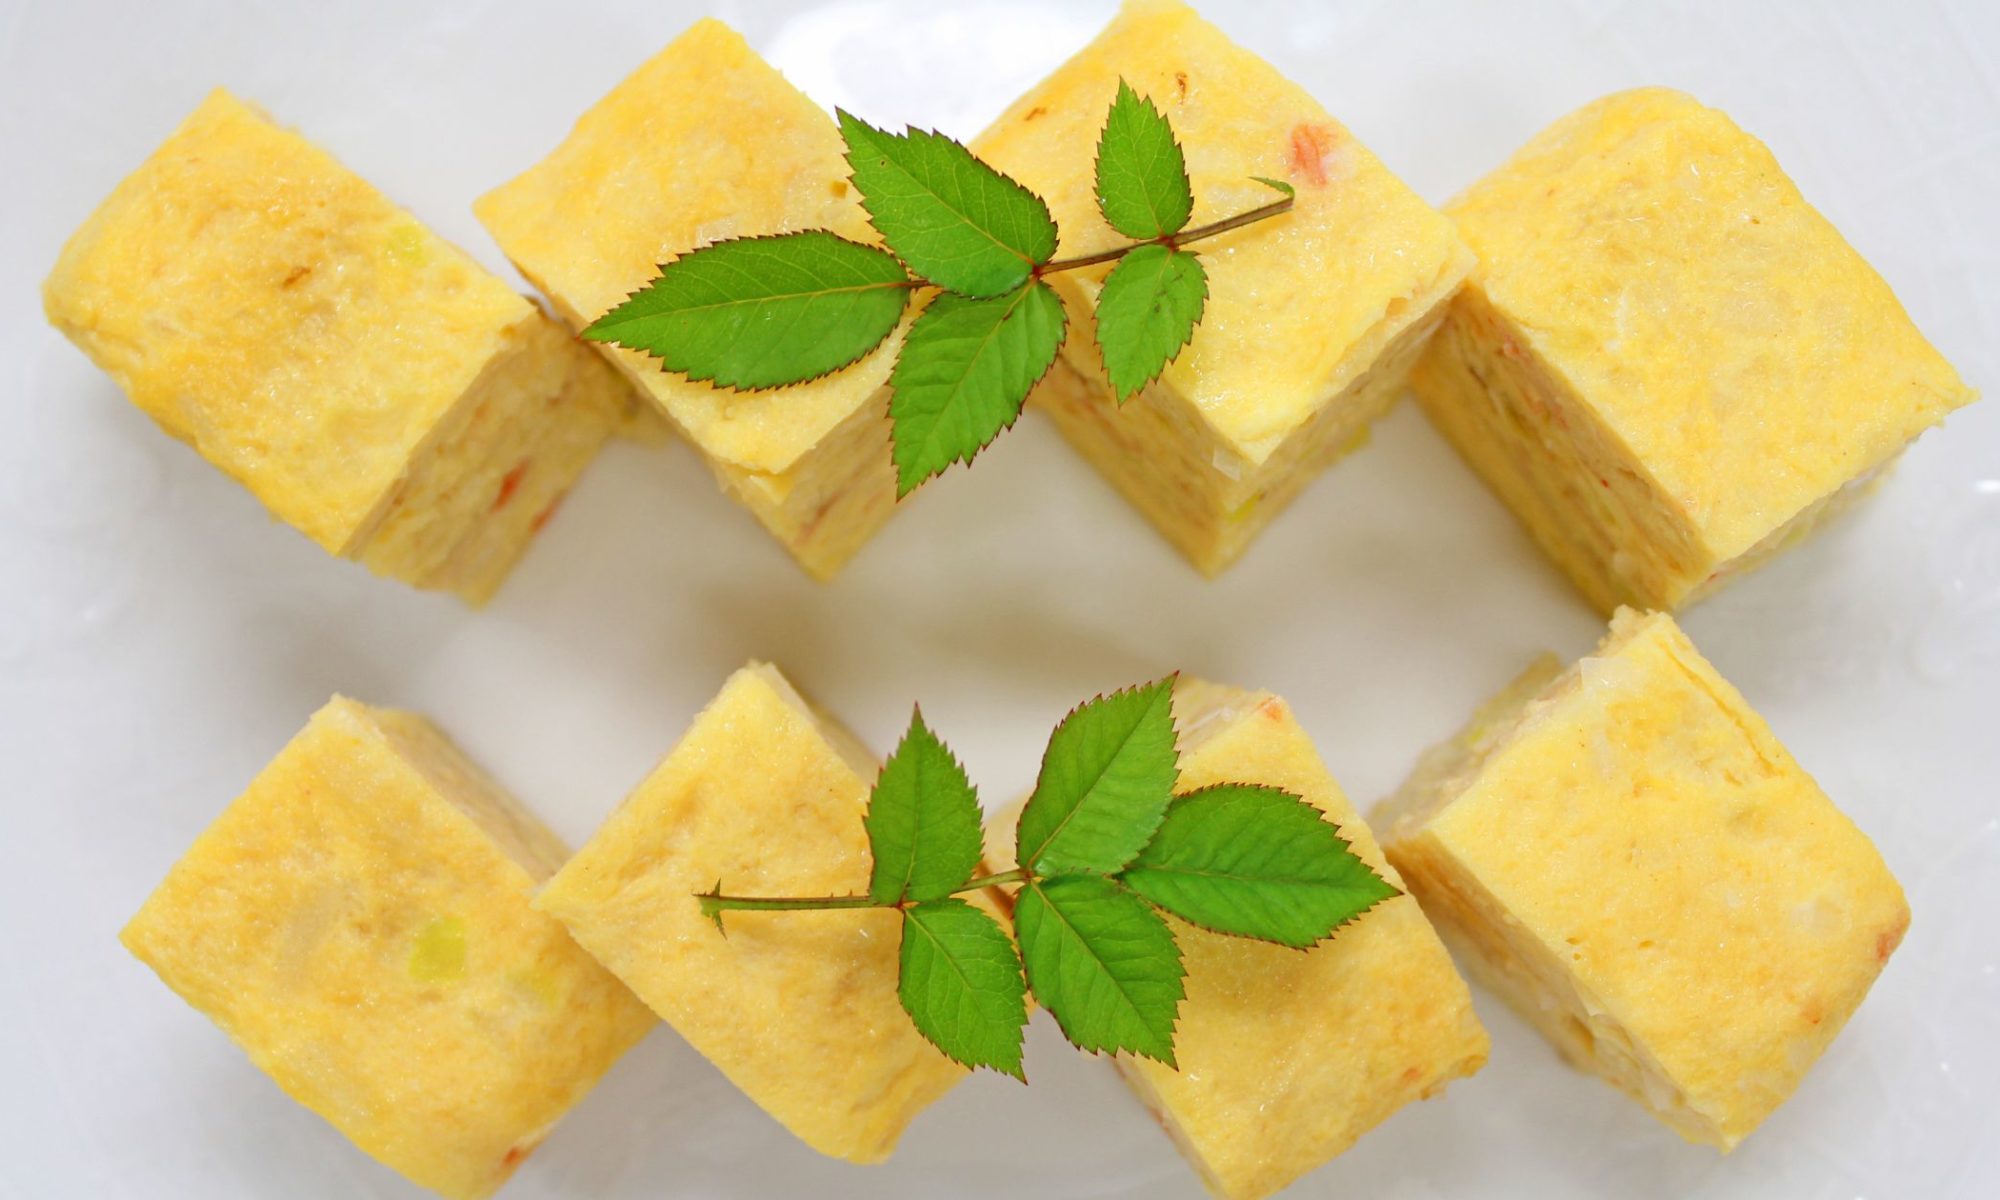
The foundation of any chirashi bowl is sushi rice, seasoned with a blend of vinegar, sugar, and salt, offering a subtle sweetness that complements the freshness of the toppings. Atop this bed of rice, a variety of ingredients take the stage, including slices of fresh sashimi such as salmon, tuna, and yellowtail, along with tamagoyaki (sweet egg omelet), cucumber strips, and avocado. Garnishes like sesame seeds, nori (seaweed), and ikura (salmon roe) add the final touches, bringing contrast and a burst of flavor.

Chirashi bowls serve not just as a meal but as an expression of the seasons, with chefs selecting ingredients that reflect the freshest produce and seafood available. This approach ensures that no two chirashi bowls are exactly alike, with each chef bringing their own interpretation to this traditional dish.

Key Ingredients and Variations

The beauty of the chirashi bowl lies in its versatility, allowing for an endless variety of ingredients tailored to the season, occasion, or individual preference. Common staples include:

Sushi Rice: The soul of the dish, it’s seasoned with a mixture of vinegar, sugar, and sometimes a touch of salt, creating a sticky and flavorful base.

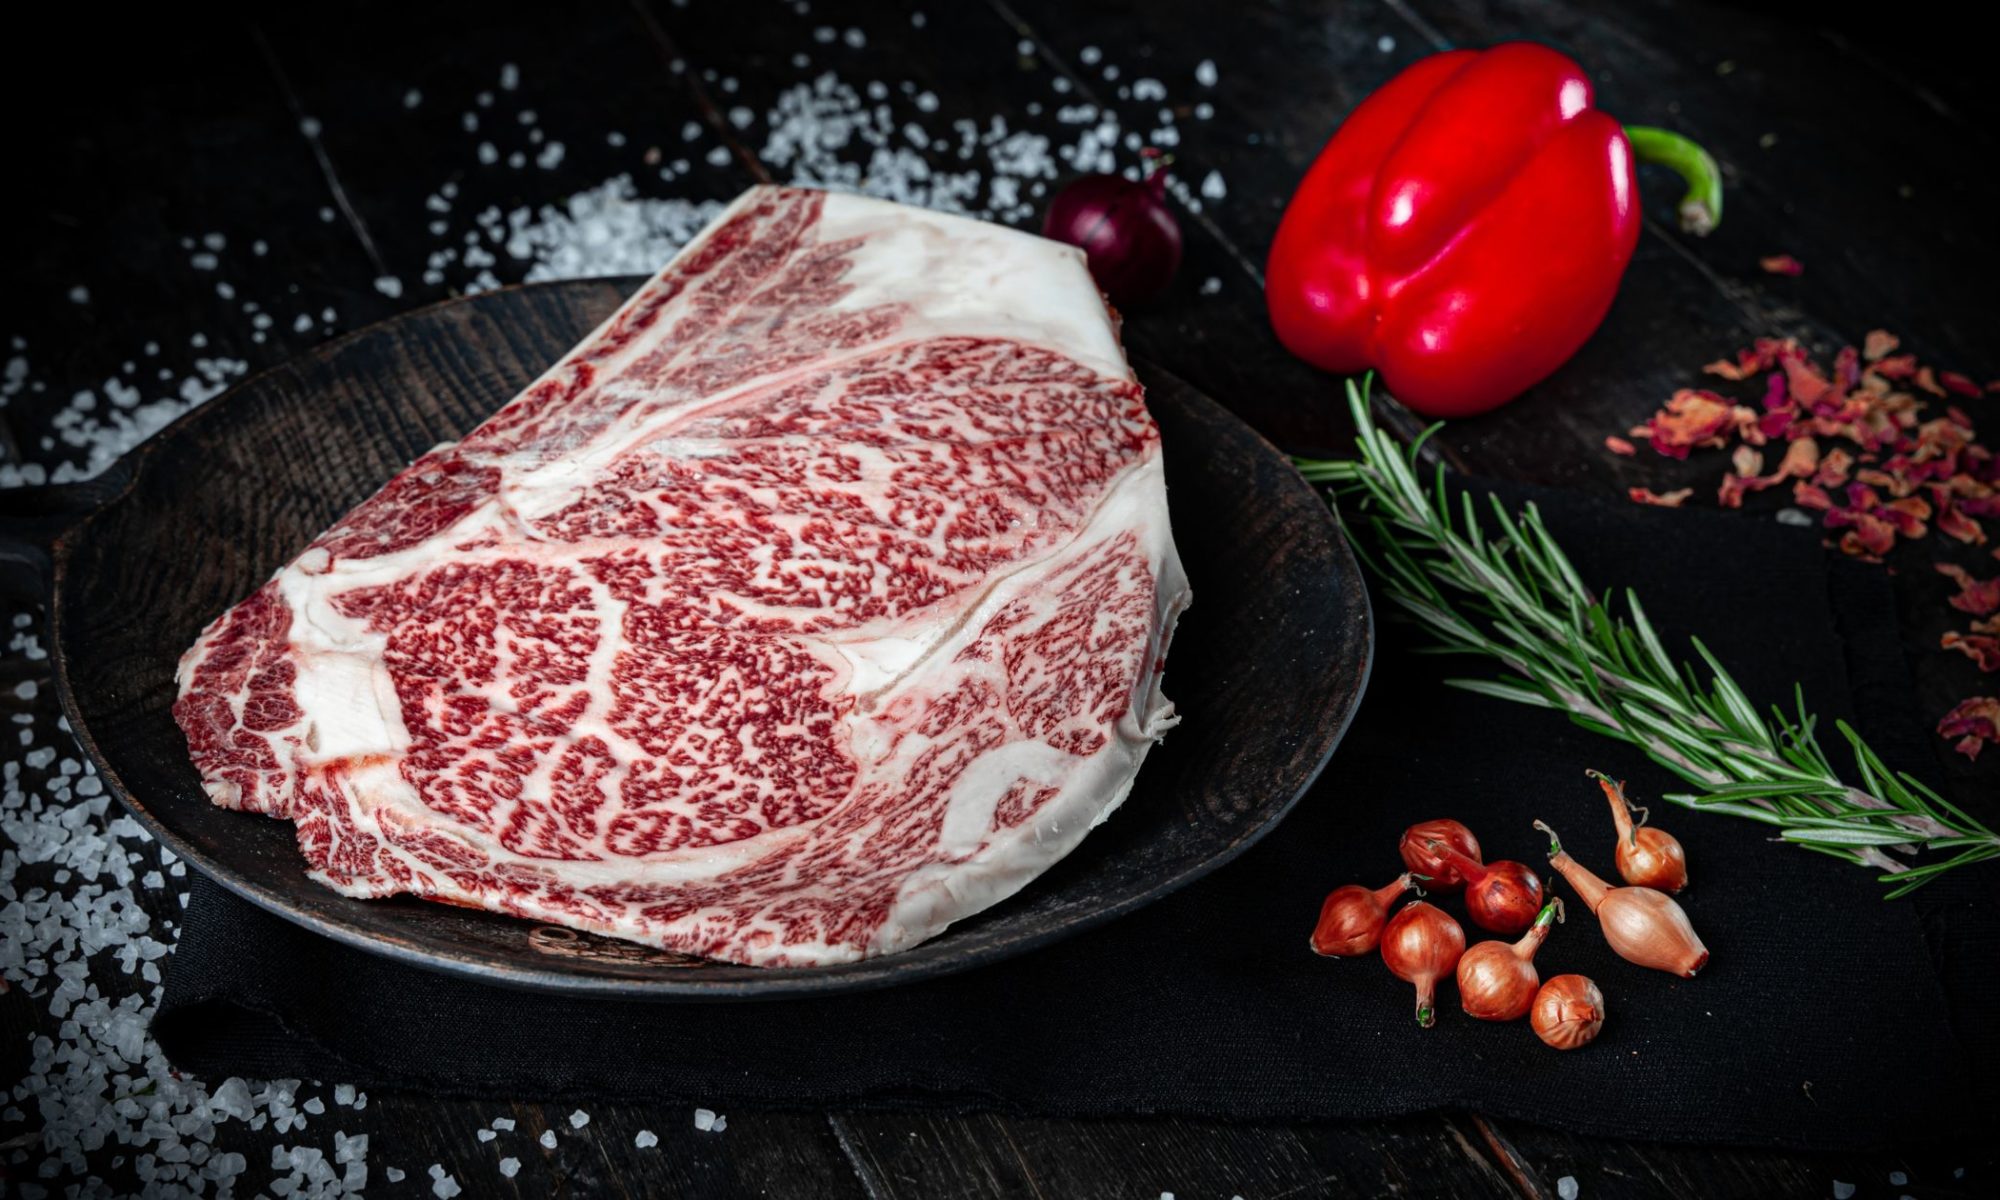
Sashimi-Grade Fish: Thinly sliced raw fish such as tuna, salmon, and yellowtail are classics. However, octopus, scallops, and shrimp are also popular choices.

Vegetables: Thinly sliced cucumber, shiso leaves, and avocado are common, offering a refreshing crunch and creaminess.

Garnishes: Sesame seeds, shredded nori, wasabi, and pickled ginger add flavor, texture, and color contrasts. Ikura (salmon roe) and tobiko (flying fish roe) introduce a delightful pop and saltiness.

Regional and seasonal variations of chirashi bowl are a testament to Japan’s rich culinary diversity. For instance, in some areas, local seafood delicacies take center stage, reflecting the catch of the day. Meanwhile, during special occasions such as Hinamatsuri (Girl’s Day), chirashi bowls might feature more colorful ingredients like pink denbu (seasoned fish flakes) and green peas, symbolizing health and happiness.

Fusion variations have also emerged, incorporating non-traditional ingredients like quinoa instead of sushi rice, or toppings like spicy mayo and teriyaki sauce. These modern takes cater to a global palate while maintaining the essence of chirashi’s harmonious blend of flavors and textures.

In crafting a chirashi bowl, the possibilities are as boundless as one’s creativity, making it a deeply personal and universally beloved dish.

How to Make a Japanese Chirashi Bowl

Creating a chirashi bowl at home is an exercise in simplicity and improvisation, making it accessible to chefs of all levels. The key to a successful chirashi bowl lies in the quality of its ingredients and the care taken in its assembly.

Preparing the Sushi Rice: Start by cooking short-grain Japanese rice. Once cooked, gently fold in a mixture of rice vinegar, sugar, and a pinch of salt while the rice is still warm. The goal is to achieve a balance of sweetness, tanginess, and a hint of saltiness that will complement the freshness of the toppings. Allow the rice to cool to room temperature before assembling the bowl.

Selecting the Fish: Opt for the freshest sashimi-grade fish you can find. Salmon, tuna, and yellowtail are classic choices, but feel free to include scallops, shrimp, or any other seafood you prefer. Slice the fish thinly and arrange it atop the rice in a pleasing manner.

Adding Vegetables and Garnishes: Cucumber, avocado, and shiso leaves add a refreshing crunch and herbal note to the dish. For garnishes, consider using ikura (salmon roe), tobiko (flying fish roe), thinly sliced nori, and sesame seeds for extra flavor and texture.

Assembly: Begin with a bowl of sushi rice, then artfully arrange your chosen ingredients on top. There’s no right or wrong way to do this—chirashi bowls are as much about personal expression as they are about taste.

A chirashi bowl can be customized to suit any dietary preference, making it a versatile dish for any occasion. Whether you’re a sushi aficionado or new to Japanese cuisine, making a chirashi bowl is a delightful way to explore the flavors and aesthetics of Japan.

The Art of Presentation

In Japanese cuisine, presentation is nearly as important as taste. The chirashi bowl, with its array of colors, textures, and shapes, offers a perfect canvas for culinary artistry. Here are some tips to elevate the visual appeal of your chirashi bowl:

Color Balance: Aim for a variety of colors to make the bowl visually appealing. The vibrant pink of tuna, the rich orange of salmon, the deep green of avocado, and the bright yellow of tamagoyaki can create a stunning visual contrast against the white rice.

Texture Contrast: Combine ingredients with different textures to add depth to the dish. The creaminess of avocado, the crunchiness of cucumber, and the softness of fish provide a delightful sensory experience.

Symmetry and Asymmetry: While some chefs prefer a symmetrical arrangement for its pleasing aesthetics, others opt for an asymmetrical design to create a more dynamic and natural look. Both approaches can result in a beautiful dish.

Garnishes: Use garnishes not just for flavor, but also to add small pops of color and texture. Sprinkles of sesame seeds, strips of nori, and dollops of wasabi can transform the dish into a work of art.

Serving Dishes: The choice of bowl or plate can also impact the presentation. A simple, elegant dish can frame your chirashi bowl beautifully, while a more ornate or colorful dish can add to the overall aesthetic.

Remember, the beauty of chirashi lies in its diversity and flexibility. Each bowl is a unique expression of the creator’s taste and style, making every chirashi bowl not just a meal, but a personal masterpiece.

Cultural Significance

The chirashi bowl is not just a dish; it’s a tapestry of Japan’s rich culinary history and cultural traditions. Each ingredient carries symbolic meanings and is carefully chosen to reflect these values. For instance, shiitake mushrooms signify longevity, while lotus root (renkon), with its holes, represents a clear future. The vibrant colors in a chirashi bowl, from the pink of the tuna to the green of the cucumber, are not only visually appealing but also carry wishes for health and prosperity.

In Japan, chirashi bowls hold a special place during certain celebrations and festivals. One notable occasion is Hinamatsuri, or Doll’s Day, celebrated on March 3rd. Families with young daughters prepare chirashi bowls to pray for their daughters’ health and happiness. The colorful presentation of the dish reflects the festive nature of the day and the bright future desired for the girls. Similarly, during New Year’s celebrations, a variation of chirashi called “osechi-ryori” is served, featuring layers of ingredients, each symbolizing different wishes for the new year.

Chirashi Bowl Today: Global Popularity and Fusion Variations

As Japanese cuisine has spread across the globe, the chirashi bowl has found a special place in the hearts of many outside Japan. Its simplicity, combined with the ability to adapt to local tastes, has made it a popular choice in Japanese restaurants worldwide. Chefs outside Japan have embraced the dish, introducing fusion variations that cater to local palates while maintaining the essence of chirashi. For example, in places where raw fish might not be as readily embraced, cooked alternatives like grilled salmon or teriyaki chicken have been used as toppings. Additionally, ingredients like mango, arugula, and spicy mayo have been added to create unique blends of flavors and textures, showcasing the dish’s versatility.

The global popularity of chirashi bowls is also a testament to the growing appreciation for Japanese cuisine’s emphasis on quality ingredients, seasonality, and presentation. The dish’s ability to adapt while retaining its core identity has led to its embrace by diverse cultures, further enriching the culinary landscape.

Tips for Enjoying Chirashi Bowl

Enjoying a chirashi bowl, whether at home or in a restaurant, is an experience that extends beyond just eating. Here are some tips to enhance this culinary journey:

At Restaurants: When dining out, consider the chef’s special chirashi bowl to experience their unique interpretation of this classic dish. It’s a great way to sample the freshest ingredients of the day. Pair your bowl with a cup of green tea or a glass of sake to complement the flavors of the fish and rice.

At Home: When making chirashi at home, focus on selecting the freshest ingredients you can find. Don’t be afraid to customize your bowl to suit your tastes or to experiment with different combinations of toppings.

Presentation Matters: Take a moment to arrange the ingredients thoughtfully, as the visual appeal is a key component of the chirashi experience. A well-presented bowl can elevate the meal, making it more enjoyable.

Etiquette: Enjoy chirashi bowl at your own pace, savoring each ingredient. It’s customary to mix the toppings and rice as you eat, allowing the flavors to blend together. Using chopsticks, try to pick up a little bit of each ingredient in every bite to enjoy the harmony of flavors.

By embracing these tips, you can fully appreciate the artistry and flavors of chirashi bowls, whether you’re exploring this dish at a restaurant or crafting your own version at home.

Conclusion

Chirashi bowl stands as a testament to the elegance and diversity of Japanese cuisine. Blending tradition with versatility, it invites both chefs and diners to explore a world of flavors and textures within a single dish. Whether celebrated in its traditional form or embraced through global fusion variations, the chirashi bowl continues to captivate palates around the world. As we appreciate its rich cultural significance and enjoy the endless possibilities it offers, the chirashi bowl remains a beloved dish for those seeking both comfort and adventure in their culinary experiences.

How to Make Japanese Tamago: A Culinary Journey

How to Make Japanese Tamago

Japanese Tamago, often referred to as Tamagoyaki, is a delicious and visually appealing dish that holds a special place in Japanese cuisine. This delectable rolled omelet is a staple in bento boxes, sushi assortments, and breakfast tables across Japan, loved for its delicate texture and subtle sweetness. Making Tamagoyaki is an art in itself, one that requires patience, practice, and a touch of culinary finesse. In this comprehensive guide, we will delve into the nuances of creating this Japanese delicacy, ensuring that even beginners can master the art of making Tamago.

The Origins of Tamagoyaki

Tamagoyaki, which translates to “grilled egg,” has a rich history in Japanese culinary traditions. It is believed to have originated during the Edo period (1603-1868) as a simple yet nourishing meal. Over time, it evolved into a refined dish, with each region in Japan adding its own unique twist. The version most commonly known outside Japan, the slightly sweet and layered omelet, is just one variation among many. Understanding its origins not only adds depth to the cooking process but also instills a sense of appreciation for the cultural significance behind this beloved dish.

Ingredients for Japanese Tamago

The beauty of Tamagoyaki lies in its simplicity. The basic ingredients include:

  • Eggs: The star of the dish. Fresh, high-quality eggs will yield the best results.
  • Sugar: Adds a subtle sweetness characteristic of many Tamagoyaki recipes.
  • Soy sauce: Provides a savory depth of flavor.
  • Mirin: A sweet rice wine that enhances the dish’s nuanced taste.
  • Salt: Just a pinch to balance the flavors.

For a more authentic experience, consider using dashi (Japanese soup stock) in the mixture. It adds umami and depth, distinguishing professional-grade Tamagoyaki from homemade versions.

Essential Tools

A Tamagoyaki pan, typically rectangular or square-shaped, is ideal for achieving the dish’s signature layers. However, a regular non-stick skillet can also be used with a bit of practice. Additionally, you’ll need a spatula that fits comfortably in your pan to help with the rolling process.

The Art of Making Japanese Tamago

1. Preparing the Egg Mixture

Begin by whisking the eggs in a bowl until completely blended. Then, incorporate the sugar, soy sauce, mirin, and salt (and dashi if you’re using it), ensuring the mixture is uniform. Straining the mixture through a fine sieve can help achieve a smoother consistency.

2. Heating the Pan

Heat your Tamagoyaki pan or non-stick skillet over medium-low heat. The key is to maintain a temperature that cooks the eggs without browning them too quickly. Brush the pan with a thin layer of oil to prevent sticking.

3. Layering the Omelet

Pour a thin layer of the egg mixture into the pan, tilting it to cover the bottom evenly. As the edges start to set, gently roll the omelet towards you, starting from the far edge. Once rolled, push it to the opposite end of the pan. Brush the pan again with oil, pour another layer of egg mixture, lifting the existing roll to let the liquid run underneath. Repeat the rolling process, incorporating the new layer into the existing roll. Continue until all the egg mixture is used.

4. Shaping and Cooling

Once your Tamagoyaki is fully rolled, gently press and shape it with a sushi mat or paper towels while it’s still hot. This helps achieve the iconic rectangular shape. Allow it to cool before slicing to serve.

Variations and Serving Suggestions

Tamagoyaki can be customized in numerous ways. Additions like cheese, spinach, or ham can be layered in for a different taste or nutritional boost. In sushi, a slice of Tamagoyaki can add a sweet and savory element to nigiri.

When serving, cut the Tamagoyaki into bite-sized pieces, showcasing the layers. It can be a standalone dish, part of a bento box, or a side to rice and miso soup for a traditional Japanese breakfast.

Also Read: Japanese Egg Salad Sandwich Recipe: Craft a Delightful Culinary Fusion

Tips for Perfect Japanese Tamago

Practice Makes Perfect: Achieving the perfect roll takes practice. Don’t be discouraged by initial failures; even in Japan, mastering Tamagoyaki is considered an art.

Control the Heat: Too high, and the eggs will brown and toughen; too low, and they won’t set properly. Finding the right temperature is key.

Quality Ingredients: Given the simplicity of the dish, the quality of each ingredient shines through. Use the freshest eggs and high-quality condiments for the best flavor.

Final Thoughts

Tamagoyaki’s charm lies in its simplicity, versatility, and the skill required to perfect it. Each roll you make is a step closer to mastering a culinary art form that has been cherished in Japan for centuries. It’s a dish that invites experimentation and can evolve with your culinary journey. Whether you’re making a quick breakfast for one or a sophisticated addition to a family meal, Tamagoyaki brings a taste of Japan to your table, inviting you to savor each bite with mindfulness and joy.

Chef’s Secrets: How to Cook Japanese Wagyu for Maximum Flavor

Cook Japanese Wagyu

Japanese Wagyu beef represents the pinnacle of culinary luxury, renowned worldwide for its marbled appearance, succulent texture, and unparalleled flavor. The mere mention of it conjures images of meticulously prepared dishes that celebrate the essence of high-quality beef. Cooking Japanese Wagyu, however, requires a blend of reverence for its origins, an understanding of its unique qualities, and a mastery of techniques that highlight rather than overshadow its natural splendor. In this guide, we’ll explore the journey of cooking Japanese Wagyu, from selecting the perfect cut to savoring the very last bite, ensuring that you honor this exquisite ingredient in every step.

Understanding Japanese Wagyu

Wagyu, which literally means “Japanese cow,” refers to specific breeds of cattle genetically predisposed to intense marbling. The fat within Wagyu beef is high in oleic acid, contributing to a melting point lower than that of regular beef, which is why it can literally melt in your mouth. There are several grades of Wagyu, with A5 ranking at the pinnacle for its marbling, texture, and color.

Selecting Your Wagyu

When selecting Wagyu, pay attention to its grade. Japanese Wagyu is graded based on its yield (A-C) and quality (1-5), with A5 being the highest possible score. This grade takes into account factors like marbling, color, brightness, firmness, and texture of the meat. For cooking at home, a ribeye or sirloin cut is often recommended due to their balance of flavor and marbling.

Preparing for Cooking

Wagyu should be cooked at room temperature, so remove it from the refrigerator about an hour before cooking. This allows for more even cooking. Given its rich marbling, Wagyu doesn’t require much seasoning. A light sprinkle of sea salt is often enough to enhance its natural flavors.

Cooking Methods

Cooking Japanese Wagyu beef is an art that marries simplicity with precision. The methods of pan-searing and grilling are particularly popular for their ability to enhance the meat’s natural flavors while ensuring a texture that’s nothing short of divine. Below, we delve deeper into these cooking techniques, offering insights and tips to elevate your Wagyu experience.

Pan-Searing Wagyu

Pan-searing is a quintessential method for cooking Wagyu, emphasizing its rich marbling and tender texture. The key here is to achieve a perfect sear that encapsulates the juices, creating a contrast between the caramelized exterior and the melt-in-your-mouth interior.

1.  Heat the Pan

Select a heavy, high-quality cast-iron skillet for its excellent heat retention and distribution. Place it on the stove over medium-high heat to preheat. The ideal temperature is crucial – the pan should be sufficiently hot to sear the meat without smoking excessively, as Wagyu fat burns easily due to its lower melting point. A simple water drop test can gauge the pan’s readiness; the water should sizzle upon contact if the pan is adequately heated.

2.  Sear the Wagyu

Before placing your Wagyu in the pan, ensure it is dry on the surface to achieve the best sear. Use kitchen paper to gently pat the steak. This step is crucial for that coveted, crisp crust. Place the steak in the pan without overcrowding to ensure each piece has enough room. Sear for about 1-2 minutes on one side. The exact time will depend on the steak’s thickness and your desired level of doneness, though rare to medium-rare is recommended to preserve the meat’s integrity. After searing one side to a golden-brown hue, flip it carefully to sear the other side, allowing the fat to render slightly and envelop the steak in its rich flavors.

3.  Rest Before Serving

After searing, transfer the Wagyu steak to a warm plate and let it rest for a few minutes. This step is vital as it allows the fibers of the meat to relax, and the juices, which have been driven to the center of the steak by the heat, to redistribute and reabsorb into the meat, ensuring that each bite is juicy and flavorful.

Grilling Wagyu

Grilling Wagyu over charcoal infuses the meat with a subtle smokiness that complements its natural richness without overshadowing its delicate flavors. This method is about embracing the elemental aspect of cooking with fire.

1.  Prepare the Grill

For an authentic grilling experience, use charcoal to impart a smoky nuance to the Wagyu. Preheat your grill to a medium-high temperature before introducing the meat. The goal is to create an environment that’s hot enough to cook quickly while imbuing the steak with the essence of the smoke. Ensure that your grates are clean and lightly oiled to prevent sticking.

2.  Grill the Wagyu

Once the grill is ready, place your Wagyu steaks directly over the heat. Keep the lid open to monitor the cooking process closely. Grill the steaks for about 1-2 minutes on each side. Given Wagyu’s propensity for flare-ups due to its high fat content, be vigilant and ready to move the steaks to a cooler part of the grill if necessary. The aim is to achieve a light char on the outside while maintaining a rare to medium-rare interior, optimizing the texture and flavor profile of the beef.

3.  Rest and Serve

Like pan-searing, resting is a crucial final step in grilling Wagyu. Remove the steaks from the grill and let them rest on a warm plate for a few minutes. This pause allows the meat to settle and reabsorb its juices, ensuring that your Wagyu will be as succulent as possible. When ready to serve, consider slicing the steak against the grain. This technique cuts through the muscle fibers, making each piece tender and easier to chew, allowing the steak’s luxurious texture and rich flavors to be fully appreciated with each bite.

Complementary Sides and Pairings

To accompany Wagyu, select sides that balance its richness without competing for attention. Simple steamed vegetables, a light salad, or a delicate risotto can serve as perfect complements. As for drinks, a robust red wine, such as a Cabernet Sauvignon or a traditional Japanese sake, can elevate the dining experience.

Serving Japanese Wagyu

When serving Wagyu, simplicity is key. The focus should be on the meat’s flavor and texture. Slice it thinly to appreciate its tenderness and distribute it evenly among your diners to share the luxurious experience.

Also Read: Japanese Beef Stew Recipe: Crafting Comfort in Every Bite

Final Thoughts

Cooking Japanese Wagyu is as much about technique as it is about paying homage to its origin and craftsmanship. It invites a minimalist approach, allowing the quality of the meat to shine through. Whether pan-seared or grilled, served with a simple side or enjoyed on its own, Wagyu offers a culinary experience that transcends the ordinary, transforming a meal into a moment to be savored and remembered.

In embracing the subtleties of cooking Japanese Wagyu, you’re not just preparing a meal; you’re crafting an experience that celebrates the zenith of culinary luxury. Through understanding, respecting, and thoughtfully preparing Wagyu, you honor the tradition and meticulous care that goes into its production. It’s a journey of discovery, one where every bite tells a story of flavor, texture, and the uncompromising pursuit of excellence that defines Japanese Wagyu.

Japanese Octopus Balls: A Culinary Dive into Takoyaki

Japanese Octopus Balls

In the heart of Japan’s bustling street food scene lies a delicacy that has captivated the taste buds of locals and tourists alike: Takoyaki. These Japanese octopus balls are not only a culinary delight but also a testament to Japan’s rich culture and innovative cuisine. This article takes you on a flavorful journey through the origins, cultural significance, and a detailed step-by-step recipe to create your own Takoyaki at home.

The Origins of Takoyaki

Takoyaki, or octopus balls, originated from Osaka in the early 20th century. The dish was invented by Tomekichi Endo, who was inspired to create a new type of snack using octopus, a common ingredient in the Kansai region. The name “Takoyaki” itself is quite descriptive, with “Tako” meaning octopus and “Yaki” meaning grilled or cooked. Over the years, Takoyaki has not only become a staple street food in Osaka but has also gained popularity across Japan and around the world.

Cultural Significance

Takoyaki holds a special place in Japanese culture, symbolizing more than just a tasty snack. It represents the communal and sharing aspect of Japanese dining, often enjoyed at festivals, family gatherings, and casual get-togethers. The preparation of Takoyaki is considered an art and a communal activity, where everyone gathers around the Takoyaki pan, taking turns flipping the balls and sharing the joy of cooking together.

Ingredients for Homemade Takoyaki

To make Takoyaki at home, you’ll need a specialized Takoyaki pan, which has hemispherical molds. The ingredients are straightforward and can be adjusted based on your preference:

  • 2 cups all-purpose flour
  • 2 1/2 cups dashi (Japanese soup stock)
  • 2 eggs
  • 1 tsp soy sauce
  • 1/2 tsp salt
  • 2 green onions, finely chopped
  • 1/4 cup pickled red ginger (beni shoga), chopped
  • 1 cup cooked octopus pieces, cut into small cubes
  • Vegetable oil (for greasing the pan)
  • Toppings: Takoyaki sauce, mayonnaise, bonito flakes, and green seaweed (aonori)

The Art of Making Takoyaki

Step 1: Preparing the Batter

Begin by preparing the batter. In a large bowl, whisk together the flour, dashi, eggs, soy sauce, and salt until smooth. The consistency should be thin, similar to a crepe batter. This ensures that the Takoyaki will be soft and fluffy on the inside.

Step 2: Prepping the Fillings

Finely chop the green onions and pickled red ginger. These ingredients add a burst of flavor and a slight crunch to the Takoyaki. Cut the cooked octopus into small, bite-sized pieces. The octopus is the star of the dish, so make sure it’s tender and well-cooked.

Step 3: Heating the Takoyaki Pan

Heat your Takoyaki pan over medium heat and lightly grease each mold with vegetable oil. It’s essential that the pan is hot enough so that the batter starts cooking immediately upon contact, forming the outer shell of the balls.

Step 4: Pouring the Batter and Adding the Fillings

Pour the batter into the molds, filling them almost to the top. Don’t worry if some batter spills over; it will be trimmed later. Immediately add the octopus pieces, green onions, and pickled red ginger into each mold. The key is to work quickly before the batter sets.

Step 5: The Flip

Once the bottom of the Takoyaki starts to set and turn golden brown, use a Takoyaki turner or a skewer to flip them. This is the most challenging yet fun part of making Takoyaki. The goal is to turn them 90 degrees at first, allowing the uncooked batter to flow into the mold, and then continue turning until you form a perfect sphere.

Step 6: Cooking to Perfection

Continue cooking, turning the balls occasionally, until they are evenly golden brown and crispy on the outside, which should take about 4-5 minutes. The interior should remain soft and gooey, encapsulating the tender octopus pieces.

Step 7: Serving with Toppings

Once cooked, remove the Takoyaki from the pan and place them on a plate. Drizzle generously with Takoyaki sauce and mayonnaise. Sprinkle bonito flakes and green seaweed on top. The heat from the Takoyaki will make the bonito flakes dance, adding a delightful visual effect to this delicious snack.

Also Read: How to Make Perfect Japanese Rice Balls Every Time!

Final Thoughts

Making Takoyaki at home is a delightful experience that brings a piece of Japanese street food culture into your kitchen. It’s a dish that encourages creativity and communal cooking, making it not only a treat for the palate but also for the heart. Whether you’re a seasoned chef or a curious food enthusiast, the art of making Takoyaki offers a unique culinary adventure that is both fun and rewarding.

By following this detailed recipe, you can enjoy authentic Japanese octopus balls anytime, bringing the flavors of Osaka’s street food scene right to your home. It’s more than just a recipe; it’s an invitation to explore the rich culinary traditions of Japan and to share the joy of cooking and eating with loved ones.